HOw To RAISED GARDEN BEDS, STEP ONE COMPLETE
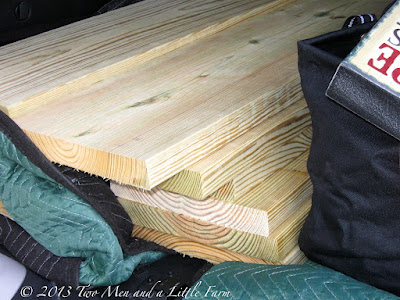
First, I loaded the Jeep (these were NOT fitting in my Fiat, LOL) with the boards. I went with 2x12's that were 8 feet long. Other than the two longer beds, they could all be 4 feet so I had the store cut them in half for me. That saved me lots of work, not to mention, 4 foot long boards are much easier to carry.
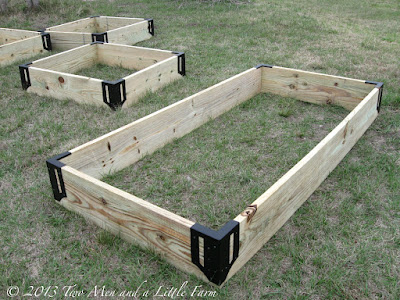
These are some awesome things I found online last year. They are corner brackets/braces that made it so much easier to put them together. I bought them on sale last year in the Summer when I guess people weren't buying them. At the time, hey were $16 for a set of 4, which is $4/corner. Definitely worth it.
You just position two boards in an "L shape" and then this fits right on the corner with a little groove that goes down over the top. After that, you simply screw them in. I used galvanized decking screws so that the screws will not rust. Again, a bit pricier initially than just regular screws, but I'll pay a bit more now for less worries later. Same with the brackets. Sure I know you can build beds without them, but I opted for something that made it a bit easier for my first time as well as making sure to hold them together.
It could not have been easier.
It could not have been easier.
During the process, 2nd Family's dog "Blue" came to visit. First he was excited to see me and jumped around licking and tail wagging, then he had to go see what all the fuss was about.
"Do NOT pee on all my hard work, Blue!"
He didn't, at least not there in front of me, who knows what has happened today.
Here they are about a little more than half through the process. I had to hurry because the skies were getting dark. A few sprinkles here and there didn't deter me, but a downpour certainly would.
Here they all are finished. I'm not exaggerating when I say that I literally used the LAST screw in the box, flipped the frame down onto the ground, and it started pouring rain! So I gathered up my tools and ran back to the house, sitting on the porch in a rocking chair and admiring my handiwork.
The rest of Saturday was a washout (it was 5pm anyway) and it rained all day Sunday as well. I didn't get them positioned, but I also didn't expect to get all of them finished so I still feel ahead of the game. Next weekend (weather permitting!) I'll space them all apart, level them, and then I plan on tilling the ground inside them and starting a lasagna style gardening plan when filling them. Baby steps. First big part done.
UPDATE: Several of you have mentioned the corner brackets and I realized that I failed to mention where I got them. I originally purchased them at Plow and Hearth, however, they sell them through Amazon here:
Set of 4 Solid Steel Raised Bed Corner Brackets.
Amazon also sells other brands and styles, CLICK HERE
They are full price now, as I said, I bought mine last year when they were on a deep discount, probably because it was off season. Right now is the height of garden planning so they are full price and in demand.


Comments
Post a Comment