Posts

Showing posts with the label Raised Beds

HOw To FUTURE GARDEN SITE DECIDED

Image
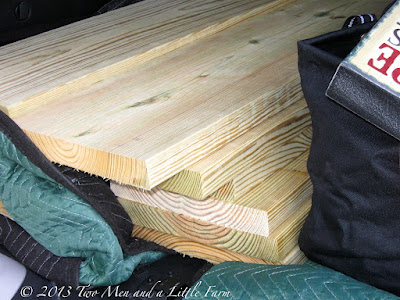
Here we go with the planning! Part of our plan has always been to build raised beds and create a fairly substantial (for us anyway) garden area.  So this past weekend, when it wasn't raining, we spent time roaming around and we finally picked the spot: Future Site of Raised Bed Garden It is this one!  It's a flat area, with minimal trees/bushes.  It's near the house but still far enough away that it will be its own separate area, and it gets full sun almost all day long.  This photo was taken very late in the afternoon and there are some shadows because the Sun was rapidly setting.  There are definitely 6-8 hours of full sun which is, of course, the best choice for a well producing garden. OK, I'm not the best with using a photo editing program to draw on, but this is, roughly, our plan.  It's so  not to scale, my apologies, LOL.  We want to put in eight, 4' wide and 8' long raised beds....

HOw To WEED BLOCK BETWEEN RAISED BEDS PART ONE

Image
Weed block fabric rolls So this weekend, I had several things planned.  Well, first I spent too long in Home Depot on Saturday (but I did get a bunch of stuff).  Then on Sunday when I went to the farm again, I didn't realize how much rain we had received out there.  Probably 2 or 3 inches!  Water was standing EVERYWHERE .  So that limited my plans.  I decided to focus on the garden area.  With our hard freeze over several nights, the grass has been made dormant.  So I bought weed block fabric, and I opted for the higher end stuff, commercial grade. Putting down the newspaper and weed block I put it down in the small sections until I found a rhythm.  It's really not too hard, except for the fact that it was also WINDY.  Sigh.   Rolling out the weed block fabric What I did first, but realize now that I didn't get a photo of, was put down some newspaper and cardboard, that's why they are puffed up a bit.  ...

HOw To GARDEN AREA PROGRESS PART TWO

Image
Raised bed garden area So when I got to the farm, this was what I had remaining.  It looks harder than it really was.  I was thinking about what to do first, build the rest of the raised beds (eight more 4'x4' squares) and then put the weed cloth down or do it the other way, put the cloth down first and then put the beds on top of it.  Putting down the weed block fabric  It really made more sense (and was WAY easier) to just put the fabric down on  all the rest of the empty space.  I put down the newspaper and cardboard that I had left (ran out but oh well) and then rolled out the weed block fabric.  Thankfully it wasn't as windy as the weekend before so it was not too bad.  I would roll it out a few feet at a time and then use the lawn staples to hold it down and then go a few feet more.  It took about three hours but I got it done. Update:  Some of you have asked about the lawn staples. Here is a LINK...

HOw To RAISED BEDS WEEKEND PROGRESS

Image
These corners are SO awesome, I can't sing their praises enough.  Now whether they will hold up for years, of course, remains to be seen.  But for now, they were a lifesaver.  I would put three pieces down (U-shape) and screw them together with two brackets and then... ...flip them up on one end, and lay the fourth and final board across the two side pieces and slip the brackets on.  Then I just screwed them in place and it was done.  I could move them like large square wheels and get them to where they needed to be. While the corner brackets are awesome...the screws they come with don't look very substantial.  So I splurged and bought these "Deck Mate" screws.  They are guaranteed for life against rust and that's important to hold the beds together.  The hardest part was getting them into the correct position and distance apart, because I couldn't just slide them into place once they were down for fear of pulling up the...

HOw To RAISED GARDEN BEDS, STEP ONE COMPLETE

Image
First, I loaded the Jeep (these were NOT fitting in my Fiat , LOL) with the boards.  I went with 2x12's that were 8 feet long.  Other than the two longer beds, they could all be 4 feet so I had the store cut them in half for me.  That saved me lots of work, not to mention, 4 foot long boards are much easier to carry. These are some awesome things I found online last year.  They are corner brackets/braces that made it  so much easier to put them together.  I bought them on sale last year in the Summer when I guess people weren't buying them.  At the time, hey were $16 for a set of 4, which is $4/corner.  Definitely worth it. You just position two boards in an "L shape" and then this fits right on the corner with a little groove that goes down over the top.  After that, you simply screw them in.  I used galvanized decking screws so that the screws will not rust.  Again, a bit pricier initially ...

HOw To RAISED GARDEN BEDS, STEP TWO COMPLETE

Image
When I got to the farm, all the beds were exactly where I left them, no one had moved them for me, ha.  But what I thought would be easy, turned out to be much more time consuming than I realized.  You see, on paper, I drew it out as a rectangular piece of property.  Then I realized that the back fence is at an angle so my plans wouldn't come out exactly as I anticipated. So I had to move them, again and again .  Over three feet?  No.  Forward two feet?  No.  Back two feet? No.  Is it lined up with the fence?  Yes, but wait, now it's crooked.  Let's move them oh wait, now future expansions run into the brush.  That won't work.  So, I kept moving them around.  Thankfully with the corner brackets , I could just roll them like square tires! I had to make sure they were all three feet apart as that was part of the design plan, but with that, if I had to move one, all had to be moved.  Ugh. ...

HOw To SOIL FILLED WEEKEND

Image
It's soil delivery weekend* * but not this much (at least I hope not , LOL). We're having the soil for the raised beds delivered today, yay! They will be here at 11am.  The plumber comes at 10am.  A friend is stopping by at 10:30 to help us and the contractor comes at noon to see about repairing the water heater cabinet.  It will be a full day for sure.  But after everyone is gone, we will have a fully functioning house for the first time in a year. The raised beds are lonely and empty, as seen in this shot that I took before I put the cardboard down.  After today, the next part is to start planting. We're borrowing 2nd Family's wheelbarrow because our used one that was left behind by Ma when she moved, finally gave out last weekend (part of the whole good/frustrating two days we had).  The whole wheel assembly came loose from the bottom and then the axle broke.  We'll buy a new one of course, but this is like borrowing a cu...

HOw To RAISED GARDEN BEDS, STEP THREE

Image
Well, it was a very productive weekend.  First of all, we have HOT WATER!  For the first time in a year, yay!  We got some other projects done as well, yay!  A friend came by who is going to help us with some sewing projects, yay!  And of course once again, I stirred up the nosey cattle.  Not so yay for them, ha. So here is the biggest part of the weekend.  About noon on Saturday, a truck delivered 5 cubic yards of soil.  "Where do you want it?" the driver asked.  I pointed and said "right here" and he pushed a button, the back end lifted up and out it all came, landing right where I wanted it.  Here it is after I signed the piece of paper the driver gave me and he drove off, leaving us all alone with our giant mound of soil.  I can say, walking up to it can be intimidating when you first see it.  It's a lot of work but we were ready. Here is the little wheelbarrow that could.  This was borro...

HOw To HOW TO MEASURE FOR SQUARE FOOT RAISED BED GARDENING

Image
I have had some of you email me and ask me how I did the string on my raised bed.  I realized I never blogged about it, but I did of course take pictures. Here is how I sectioned off my square foot gardening.   I got some wood screws and a roll of garden twine. Then you just need a tape measure or ruler, a pen, and a drill. I measured the sides and marked them off every twelve inches. Then I just wrapped some string around and around and move it back and forth from screw to screw, wrapping each a couple of times and then tying off at the end.  You have to do it twice, once back and forth from one side to the other and then a new piece from the other side to side. After you're done, you have a measured off square foot garden.  This raised bed is 4'x4', so I ended up with 16 squares of one square foot each.  Ready for planting! It makes it easy to plant in that's for sure.  Here are some herbs in th...

HOw To RAISED BEDS LET THE GARDENING BEGIN

Image
Now that the garden is  FENCED IN , it's time to get the plants in the dirt. Well, OK, half of them are planted.  We've got six raised beds in total for this first growing season...four 4'x4' squares and two 4'x8' rectangles.  I'm not going the square foot gardening route entirely, but I'm using it as a guideline, as a few of you so kindly suggested.  In other words, I'm not sticking to it religiously but instead using it to keep myself organized in the garden and still hopefully get a bit more stuff out of the smaller space.  This is, after all, my first attempt at large scale gardening. So here is what I got planted last weekend (many of these growing in town until they could get taken out there): 4x4 Raised Bed Square Foot Garden In the first 4x4 square, I planted two Asian eggplants.  We've had great luck with the Ichiban we had in town, so we are hoping for some more this year.  Also put a Big Bertha bell pepper in the middle...

HOw To TOO MUCH WATER

Image
Is that even possible?  I suppose it is when you have low spots.  First the good news, the fruit trees all seem to be doing well, still putting on tiny fruit, new leaves, getting taller, and now the figs are starting to do their thing. And the raised herb bed is doing wonderfully as well: Raised bed with Herbs They are growing and thriving.  In fact, we harvested some to bring back into town to use.  I think the herbs are happy. What doesn't seem to be happy however are some of the veggies! Lost a tomato plant.  This is one of the Homestead 24's.  Now in all fairness, this is one that had broken off from the mother plant and I had rooted it.  It grew a fruit so it was doing well, until I put it in the ground. Then one of my Asian Eggplants is this happening to it's leaves.  It's grown over the last week but not sure if this is a sign of something.  The leeks and other plants in the bed are doing ok ...