Posts

Showing posts matching the search for raised-garden-beds-step-one-complete

HOw To GARDEN AREA PROGRESS PART TWO

Image
Raised bed garden area So when I got to the farm, this was what I had remaining.  It looks harder than it really was.  I was thinking about what to do first, build the rest of the raised beds (eight more 4'x4' squares) and then put the weed cloth down or do it the other way, put the cloth down first and then put the beds on top of it.  Putting down the weed block fabric  It really made more sense (and was WAY easier) to just put the fabric down on  all the rest of the empty space.  I put down the newspaper and cardboard that I had left (ran out but oh well) and then rolled out the weed block fabric.  Thankfully it wasn't as windy as the weekend before so it was not too bad.  I would roll it out a few feet at a time and then use the lawn staples to hold it down and then go a few feet more.  It took about three hours but I got it done. Update:  Some of you have asked about the lawn staples. Here is a LINK...
HOw To RAISED GARDEN BEDS, STEP ONE COMPLETE

Image
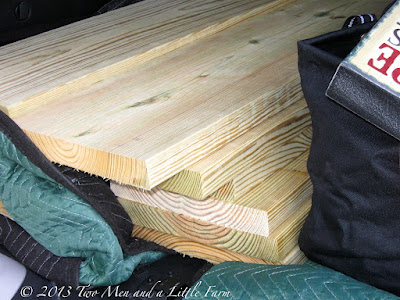
First, I loaded the Jeep (these were NOT fitting in my Fiat , LOL) with the boards.  I went with 2x12's that were 8 feet long.  Other than the two longer beds, they could all be 4 feet so I had the store cut them in half for me.  That saved me lots of work, not to mention, 4 foot long boards are much easier to carry. These are some awesome things I found online last year.  They are corner brackets/braces that made it  so much easier to put them together.  I bought them on sale last year in the Summer when I guess people weren't buying them.  At the time, hey were $16 for a set of 4, which is $4/corner.  Definitely worth it. You just position two boards in an "L shape" and then this fits right on the corner with a little groove that goes down over the top.  After that, you simply screw them in.  I used galvanized decking screws so that the screws will not rust.  Again, a bit pricier initially ...

HOw To RAISED GARDEN BEDS, STEP TWO COMPLETE

Image
When I got to the farm, all the beds were exactly where I left them, no one had moved them for me, ha.  But what I thought would be easy, turned out to be much more time consuming than I realized.  You see, on paper, I drew it out as a rectangular piece of property.  Then I realized that the back fence is at an angle so my plans wouldn't come out exactly as I anticipated. So I had to move them, again and again .  Over three feet?  No.  Forward two feet?  No.  Back two feet? No.  Is it lined up with the fence?  Yes, but wait, now it's crooked.  Let's move them oh wait, now future expansions run into the brush.  That won't work.  So, I kept moving them around.  Thankfully with the corner brackets , I could just roll them like square tires! I had to make sure they were all three feet apart as that was part of the design plan, but with that, if I had to move one, all had to be moved.  Ugh. ...

HOw To BRINGING WATER TO THE OTHER HALF OF THE GARDEN

Image
Here is a project I did a couple of weeks ago.  I didn't get pictures so this one is before we covered the the beds for Winter.  I didn't get pictures of it because I didn't have the camera OR the phone while I was doing it.  D'oh!  So this is sort of an 'after' picture of what I did. A year and half ago (right about now actually!), I had to dig a loooooong trench from the house to the garden so we'd have water out there.  But the faucet only had four connections on it and that would only let me bring water to one half of the garden.  We needed to get it to the other half for any future growing opportunities.  Water to the other half of the garden So I bought another hose stand with the four bibs on it just like the one on the opposite side.  Since the hose goes from the house to that side of the garden, I used a Y-connection and attached another hose to it.  Then all I had to do was dig a trench directly across the garde...